
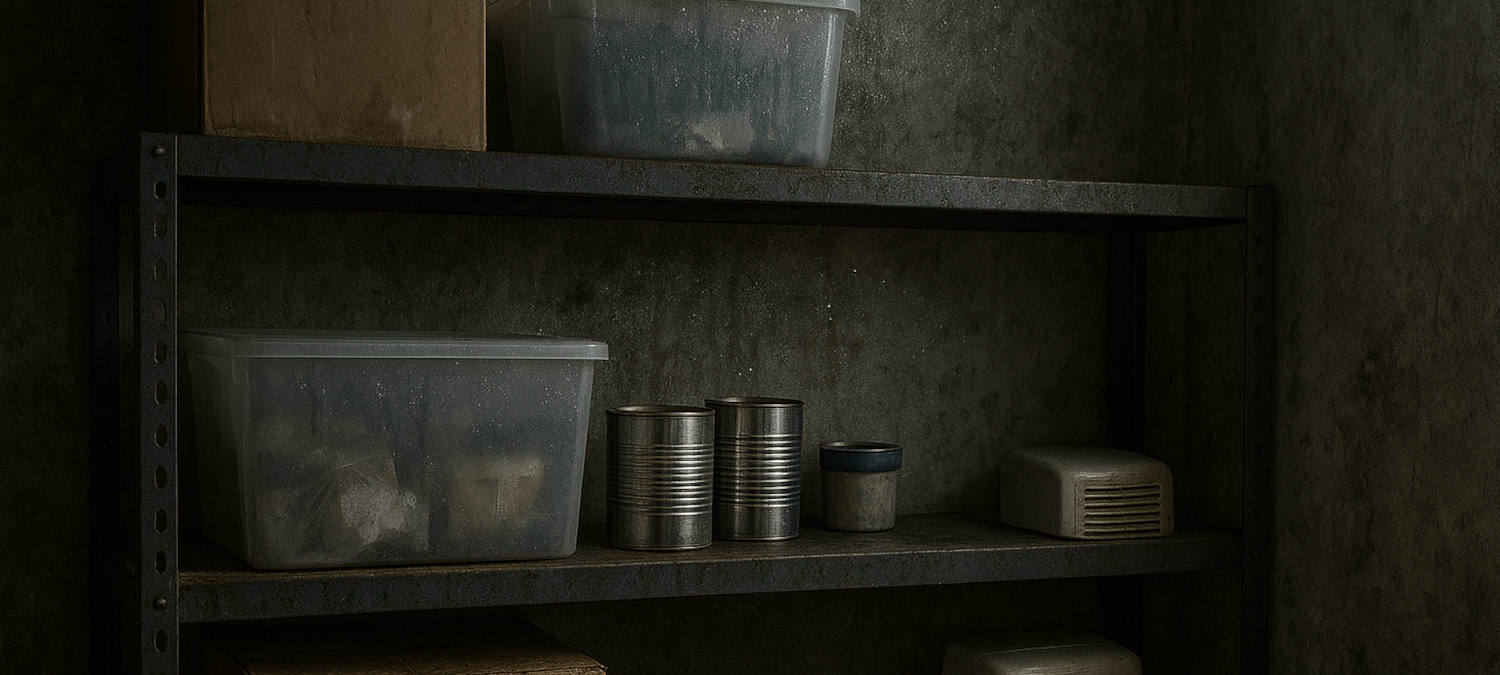
Three months after carefully building a three-day emergency pantry, a Liverpool household opened their under-stairs cupboard to find every tin covered in rust, pasta packets soft with moisture, and a spreading patch of black mould across the back wall. The cupboard sat against an external north-facing wall. The supplies had cost £120. All of it went in the bin.
This isn’t a dramatic flood or burst pipe story. It’s just normal British damp—the relentless, unsexy moisture problem that destroys more emergency supplies than any actual emergency ever will.
UK climate data shows an average of 156 days of rain per year, with relative humidity regularly exceeding 80% during winter months. Council flats with single glazing, Victorian terraces with solid walls, and modern builds with inadequate ventilation all share the same problem: moisture gets into storage spaces and ruins everything slowly, silently, and expensively.
This guide covers practical damp prevention for UK households storing emergency supplies in real British properties—not American basement bunkers or Scandinavian timber houses with perfect insulation, but damp British homes where condensation forms on windows every winter morning and mould grows in bathroom corners despite your best efforts.
Why UK Storage Damp Destroys Emergency Supplies
The British climate isn’t dramatically wet compared to tropical regions, but it’s persistently damp in a way that’s uniquely destructive to stored goods. You don’t get monsoons or hurricanes—you get drizzle, fog, and endless grey skies maintaining 70-85% relative humidity for months at a time.
UK housing stock makes this worse. Victorian terraces have solid brick walls with no cavity, allowing moisture to penetrate directly from outside. Council flats from the 1960s-80s often have poor ventilation, single glazing, and external walls with minimal insulation. Even modern builds can suffer from inadequate air circulation due to energy-efficiency measures that seal buildings tightly without providing proper mechanical ventilation.
The result: storage cupboards, especially those against external walls or in unheated spaces, become damp traps where relative humidity sits at 75-90% year-round. At those levels, mould grows, metal corrodes, and organic materials decay.
Real examples from UK households:
- Tinned goods rusted through at the seams after six months in an under-stairs cupboard
- Pasta and rice packets became breeding grounds for weevils due to moisture softening cardboard packaging
- Batteries leaked and corroded, destroying torches stored alongside them
- First aid supplies clumped together as moisture penetrated cardboard boxes
- Important documents in a basement storage unit developed foxing and mould within three months
The cost of replacing ruined supplies quickly exceeds the cost of preventing damp in the first place. A £150 dehumidifier protects £500+ worth of stored goods. Spending £40 on proper storage boxes prevents losing £200 of supplies to rust and mould.
This isn’t dramatic disaster preparedness—it’s boring British reality. You can survive floods, storms, and power cuts, but you’ll lose your emergency supplies to damp if you don’t address it systematically.
How Damp Gets Into Your Stored Supplies
Understanding how moisture enters storage spaces helps you prevent it. UK damp problems come from multiple sources, often working simultaneously.
Condensation on cold external walls: External walls, especially north-facing ones, stay cold during winter. Warm moist air inside your home contacts these cold surfaces and condenses into liquid water. Storage cupboards built against external walls experience this constantly—the back wall of the cupboard is literally wet, even if you can’t see it because boxes are stacked against it.
This phenomenon is called thermal bridging in building science. In council flats with concrete construction, entire walls can act as cold surfaces, making any storage against them vulnerable to condensation.
Rising damp in ground floor properties: Victorian terraces often lack proper damp-proof courses. Moisture from the ground wicks up through brick and plaster, creating perpetually damp walls up to about one metre above floor level. Ground floor storage cupboards, especially in corners, suffer the worst effects.
Steam from cooking and bathing: A family of four generates approximately 10-15 litres of water vapour daily through breathing, cooking, bathing, and laundry. In small flats with inadequate ventilation, this moisture has nowhere to go. It saturates the air and eventually condenses in the coldest areas—which are often your storage spaces.
Cardboard packaging acts as a moisture sponge: Supermarket goods come in cardboard. Cardboard is hygroscopic—it absorbs moisture from the air and holds it against whatever’s inside. A case of tinned tomatoes in cardboard packaging stored in a damp cupboard will develop rust faster than loose tins because the cardboard maintains constant moisture contact with the metal.
Seasonal temperature cycling: British weather swings between mild damp winters and occasionally warm summers. Storage spaces heat up and cool down, causing moisture to condense and evaporate repeatedly. This cycling is particularly destructive because it rusts metal, warps cardboard, and creates perfect conditions for mould spores to germinate.
Specific problem locations: Under-stairs cupboards (usually against external walls, unheated, poor ventilation), loft spaces (condensation on cold roof structure), unheated spare bedrooms (windows kept closed, moisture accumulates), basements (rising damp plus poor ventilation), and built-in wardrobes on external walls.
What Damp Does to Different Supplies
Different emergency supplies fail in different ways when exposed to excess moisture. Understanding these failure modes helps you prioritise protection efforts.
Tinned food: Rust forms on tin seams and lids, eventually penetrating the metal. Once the seal is compromised, bacteria can enter, including Clostridium botulinum which causes botulism. Rusted tins must be discarded regardless of how minor the rust appears—you cannot visually determine if the seal has failed. A three-month supply of tinned goods ruined by rust represents £100-150 loss for a typical household.
Dry goods in cardboard packaging: Pasta, rice, flour, and cereals in cardboard absorb moisture, which softens packaging and allows pest entry. Weevils and other storage pests target compromised packaging. Mould grows on damp cardboard and can penetrate to the food inside. Even if the food looks acceptable, moisture causes clumping and staleness.
Batteries: Moisture causes corrosion on terminals and can trigger leakage of battery acid. Alkaline batteries are particularly prone to leaking in damp conditions. Leaked battery acid destroys the battery and any device it’s stored in. A corroded battery in a torch renders the entire torch unusable, and the acid can damage anything stored nearby.
Medications: Tablets and capsules degrade when exposed to moisture, reducing effectiveness. Some medications clump together or develop discolouration. Packaging often fails to protect contents in high-humidity environments. Degraded medications may be ineffective in an emergency, which is particularly dangerous for critical prescriptions covered in the Managing Essential Medication guide.
Important documents: Paper develops foxing (brown spots from mould), ink can bleed or fade, and severe damp causes actual mould growth that makes documents illegible. Documents stored in basements or damp cupboards often become unusable within 6-12 months. This affects insurance policies, passports, birth certificates, and other critical paperwork you’d need during emergencies, as discussed in the Emergency Document Firebox guide.
Clothing and bedding stored for emergencies: Develop mildew smell first, followed by visible mould growth if damp persists. Once mould establishes in fabric, it’s nearly impossible to remove completely. The smell alone makes items unpleasant to use, and mould spores present health risks.
Torches and electronics: Internal corrosion on circuit boards and battery contacts causes failure even when the exterior looks fine. Moisture penetrates through small gaps and condenses inside sealed units. A torch that won’t turn on during a power cut is useless, regardless of how well-maintained it appeared.
Understanding Relative Humidity (And Why Your Warm Flat Still Has Damp)
Relative humidity confuses most people because the “relative” part matters more than they realise. Warm air holds more moisture than cold air—significantly more. This means the same amount of water vapour in air creates different relative humidity percentages depending on temperature.
At 20°C, air can hold roughly 17 grams of water per cubic metre. At 10°C, it can hold only 9 grams. If air at 20°C contains 12 grams of water per cubic metre, that’s 70% relative humidity—uncomfortable but manageable. Cool that same air to 10°C without removing any moisture, and suddenly you’re at 133% relative humidity, which is physically impossible. The “excess” moisture condenses into liquid water on the coldest available surface.

🐔 Chicken Licken
Did You Know?
The fact that air at 20°C holding 12g/m³ of moisture is comfortable at 70% RH — but cool the exact same air to 10°C without removing a single drop and you hit 133% RH, which is physically impossible. That’s what causes condensation in unheated cupboards. Not “damp”. Physics.
This is why unheated storage cupboards against external walls are damp traps, even in homes that feel dry and warm.
Temperature drops overnight, relative humidity spikes: Your storage cupboard might be 18°C at 60% RH in the evening—perfectly acceptable. By 3am, the external wall has cooled to 8°C, the cupboard interior has dropped to 10°C, and relative humidity has spiked to 90%. Condensation forms on the cold wall and on any cold items touching it. By morning when you open the cupboard, you feel dampness and blame “the damp”, but it’s actually physics.
Monitoring tools prevent guesswork: Digital hygrometer/thermometer combination units like the ThermoPro TP50 cost £8-15 and show current temperature, current relative humidity, and minimum/maximum values recorded since last reset.
ThermoPro TP50 Digital Hygrometer
A compact, accurate hygrometer that tells you exactly what the humidity is in any room — so you know whether you have a damp problem before mould appears. Under £15 and the easiest first step in managing moisture at home. Now sold on Amazon UK as the TempPro TP50.
Our Full Review: ThermoPro TP50 Digital Hygrometer →
Reading the data tells you what’s wrong:
- Consistent 70%+ RH: You need active dehumidification or better ventilation
- Wild RH swings (40%-80% daily): Poor insulation causing temperature cycling
- High RH only at night: Cold external wall problem—condensation forming overnight
- High RH all day: Ventilation problem or active water leak somewhere
Understanding these patterns helps you choose the right solution. If RH only spikes at night, adding gentle heat (like a desiccant dehumidifier) solves it. If RH is high constantly, you need serious moisture extraction or you have a leak to fix.
Dehumidifiers: Active Damp Control
Dehumidifiers actively extract moisture from air, and in UK storage conditions, they’re often the only solution that actually works. However, choosing the right type matters enormously.
Desiccant vs compressor types—and why desiccant wins for storage:
Compressor dehumidifiers work like refrigerators. They cool air below its dew point, causing moisture to condense on cold coils, then drain into a tank. They’re efficient in warm environments (above 15°C) but struggle or stop working entirely in cold spaces. An unheated under-stairs cupboard at 8°C renders a compressor dehumidifier useless.
Desiccant dehumidifiers use a rotating wheel of moisture-absorbing material (usually silica gel or zeolite). Air passes through the wheel, moisture sticks to the desiccant, then the wheel rotates through a heated section that evaporates the moisture into a collection tank. They work efficiently down to 1°C, making them ideal for British storage spaces that stay cold most of the year.
The secret weapon: desiccant dehumidifiers add heat:
This is the part most people miss. Desiccant dehumidifiers don’t just remove moisture—they output warm air as part of the desiccant regeneration process. The heat used to dry the desiccant wheel exits into the room, typically raising the temperature by 3-5°C in a small storage space.
This matters because warmer air = lower relative humidity even before moisture removal begins. Your under-stairs cupboard goes from 8°C at 80% RH to 13°C at 55% RH. You’ve solved two problems simultaneously: extracted moisture AND raised temperature to prevent condensation.
During winter when your storage space is coldest and dampest, you’re paying to heat your home anyway. The heat from a desiccant dehumidifier isn’t wasted—it’s warming the storage space that needs warming.

🤡 Camping Clown
He Has The £4,000 Version
I’ve got a professional-grade desiccant dehumidifier with a digital humidity display, ioniser function, and a companion app. It cost £280. The EcoAir DD1 at around £150 extracts the same moisture and outputs the same warm air.
I’m not entirely sure what the ioniser does, if I’m honest.
EcoAir DD1 Simple
The rotary-dial desiccant dehumidifier that keeps cold, solid-walled rooms dry where compressor models give up, and switches itself on from a smart plug or a timer.
Our Full Review: EcoAir DD1 Simple →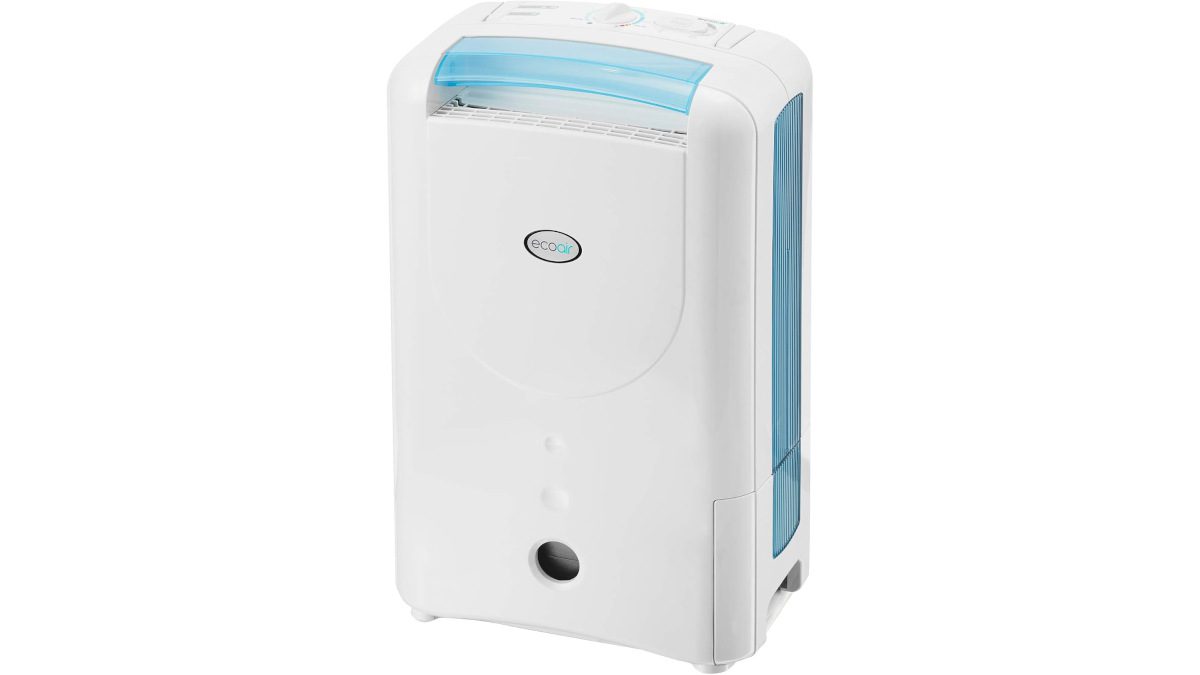
Running cost comparison: Desiccant dehumidifiers use approximately 300W (like running three old incandescent lightbulbs). Compressor types use around 200W but stop working when cold, so you get zero benefit in unheated storage during winter when you need it most. The extra £2/week for desiccant operation is worth it because it actually functions year-round.
Practical features that matter:
- Noise level: Critical if storage is near living spaces. Desiccant models like the EcoAir DD1 run at 34dB (quieter than a fridge). Compressor types often exceed 50dB.
- Laundry mode: Boosts heat output and airflow for drying emergency washing during when you can’t use a tumble dryer, or hang outside to dry, as covered in the Emergency Hygiene Guide.
- Continuous drain option: If your storage area is near a sink or drain, continuous drainage eliminates the need to empty tanks daily during winter.
- Auto shut-off when tank full: Prevents overflow if you forget to empty it.
- Extraction rate: 7-10 litres per day is adequate for a typical storage cupboard. Higher isn’t necessarily better unless you’re dehumidifying multiple rooms.
Where to position dehumidifiers: Place in the storage area itself if there’s space, or just outside with the door left ajar. Don’t position directly against walls—leave 15-20cm clearance for airflow. Run continuously during winter months (October-March) when condensation is worst, and intermittently during summer if humidity rises above 60%.
Emptying schedules: In an unheated cupboard during British winter, expect to empty 1-2 litres daily. Check every morning for the first week to establish your specific pattern, then set a routine. If you’re pulling 5+ litres daily, you either have a serious damp problem (possibly a leak) or you’re dehumidifying too large a space.
Monitoring dehumidifier effectiveness: Use a digital hygrometer like the ThermoPro TP50 to verify your dehumidifier is actually working. Place it in the storage area and check readings before and after running the dehumidifier. You should see RH drop by 10-15% after a 4-hour run. If readings barely change, either the dehumidifier is undersized for the space, or you have an active moisture source (leak, rising damp) that needs investigating.
Passive Moisture Control (No Running Costs)
Dehumidifiers cost money to run. Passive moisture absorbers don’t, making them suitable for backup protection, seasonal use, or budget-limited households.
Silica gel packets (reusable, regenerate in oven): Those little packets in shoe boxes and electronics packaging are reusable. Collect them, or buy in bulk on eBay (500g for £5-8). Place packets inside sealed storage boxes with your supplies. When they turn from blue to pink (indicating saturation), regenerate them by spreading on a baking tray and heating at 120°C for 2-3 hours. They return to blue and work again. Repeat indefinitely.
Calcium chloride tubs (cheap, disposable, effective): Products like UniBond Aero 360 or basic calcium chloride moisture traps cost £3-8 and absorb significant moisture over 1-3 months before needing replacement. They work well in enclosed spaces like cupboards. The liquid collected can be poured down drains. They’re not reusable but they’re cheap enough for seasonal use.
DIY moisture traps (actual working-class solution): Fill an old pair of tights with table salt, tie the end, and hang in your storage cupboard. The salt absorbs moisture and drips into a container placed below. When the salt is saturated (dissolved into liquid), replace with fresh salt. Cost: essentially free. Effectiveness: surprisingly good for small enclosed spaces, though it won’t match commercial products.

🦆 Keith
Don’t Be Keith
Keith spent an afternoon building an elaborate DIY moisture trap from a pair of old tights, table salt, and a repurposed biscuit tin, which he labelled “Operation Damp Suppression”. A £3 UniBond Aero 360 from B&M does the same job, holds more moisture, and doesn’t leave a ring on the shelf. Don’t be Keith.
Moisture indicator cards: These cards change colour to show relative humidity levels (10%, 20%, 30%, etc.). Place one in each storage box so you know when moisture control is failing without opening everything to check. They cost £3-5 for a pack of 10 and last indefinitely. If a card shows 60%+ RH, that box needs additional moisture control.
Where to source cheaply: eBay and Amazon sell bulk silica gel at £8-12 per kilogram. Lakeland and other premium retailers charge £15-20 for 200g in fancy packaging—it’s the same product. For calcium chloride, Poundland and B&M often stock basic moisture traps for £1-2, while branded versions in supermarkets cost £5-8. You’re paying for packaging and marketing, not effectiveness.
Storage Container Strategy
The containers you use matter as much as what you put in them. Cardboard boxes and cheap plastic tubs leak moisture. Proper airtight containers keep damp out.
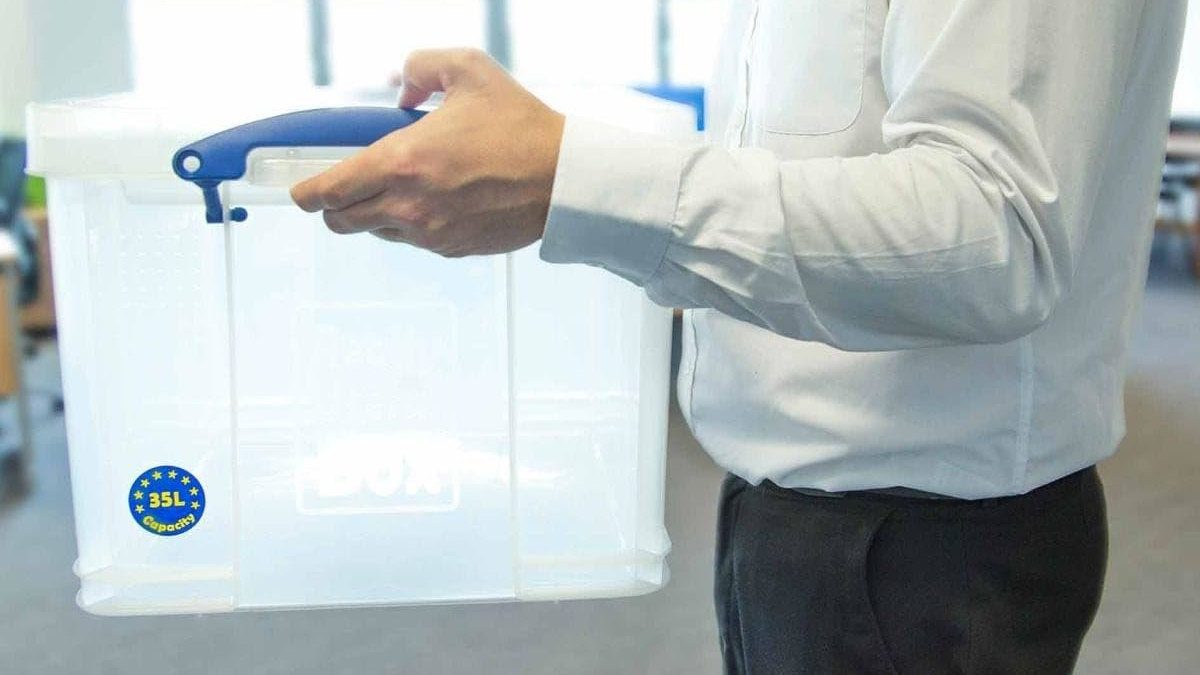
Really Useful Boxes (British company, actually waterproof): These are the standard for UK storage because they actually seal properly. The lids have gaskets that create airtight seals, and the plastic is thick enough not to crack easily. Sizes range from 3L to 84L. For emergency supplies, the 35L boxes (£8-10 each) hold a useful amount without being too heavy to move when full. They stack securely, and clear plastic lets you see contents without opening them.
Yes, they’re more expensive than £2 storage boxes from bargain shops. They’re also actually waterproof, won’t let moisture in, wont split, and stack properly which makes them worth the cost when you’re protecting £50+ of supplies per box. Read my Really Useful Box review on why these are THE storage box to use.
Really Useful Boxes
Really Useful Boxes are actually waterproof, they seal properly, and they’re engineered well. Built to last and protect anything stored in them.
Military surplus ammo cans (metal, rubber seal, cheap): Metal ammunition boxes with rubber gaskets seal excellently and cost £8-15 from surplus stores or eBay. They’re designed to keep ammunition dry in field conditions, which makes them perfect for emergency supplies. The metal conducts cold (causing internal condensation if the temperature swings wildly), so use them with silica gel packets inside. They’re particularly good for batteries, electronics, and first aid supplies.
Vacuum storage bags for textiles: Emergency clothing, bedding, and towels compress down and remain protected from moisture in vacuum bags. Remove the air with a vacuum cleaner, and moisture can’t get in because there’s no air. They’re not suitable for food (crushing damages packaging) but excellent for textiles. Cost: £5-10 for a pack of 5 large bags.
Clear vs opaque containers: Clear plastic lets you see contents without opening boxes, reducing how often you expose supplies to air and moisture. However, light degrades some items (particularly vitamins and medications). For most emergency supplies, clear is better. For medications and light-sensitive items, use opaque containers or store clear boxes in a dark cupboard.
Avoid cardboard completely in damp-prone areas: Cardboard absorbs moisture and transmits it to contents. It also provides habitat for pests. If you must use cardboard (moving boxes, etc.), line the inside with plastic sheeting or decant contents into plastic boxes as soon as possible. Cardboard should be considered temporary packaging only.
Food-Specific Storage Solutions
Food storage requires additional care beyond general damp prevention because food degradation creates waste and potential health risks.
Decanting dry goods into airtight containers: Remove pasta, rice, flour, and cereals from supermarket packaging and store in airtight plastic or glass containers. This prevents moisture penetration, blocks pest access, and makes rotation easier because you can see quantities at a glance. Label containers with purchase dates to maintain first-in-first-out rotation as covered in the Food Rotation guide.
Mylar bags with oxygen absorbers for long-term grain storage: For serious long-term storage (5+ years), food-grade Mylar bags heat-sealed with oxygen absorbers inside create a nearly perfect barrier to moisture, oxygen, and pests. This is overkill for a three-month rolling pantry but useful for bulk storage of rice, pasta, and dried beans. The oxygen absorbers create a slight vacuum as they work, which helps seal out moisture. Store sealed Mylar bags inside rigid containers to protect from rodent damage.
Tin rotation to use oldest first: Store tins with oldest at the front, newest at the back. Monthly inspection as described in the 3-Day Emergency Pantry guide identifies rust early. Use the “first in, first out” principle—the tin at the front gets used in normal cooking and replaced with a fresh one at the back. This prevents tins sitting for years until they rust through.
Complete Guide
3-Day Emergency Pantry
The low-barrier start: A shopping list of shelf-stable meals that require zero refrigeration.
Checking tins for rust monthly: Run your hand over tin surfaces feeling for rough patches indicating rust. Check seams and lids particularly carefully. If you catch rust very early (surface rust only, no pitting), wipe the tin clean, dry thoroughly, and coat lightly with cooking oil. Use that tin within the next month. If rust has pitted the metal, bin it immediately.
Freezer bags inside plastic boxes (double protection): For extra protection, seal dry goods in freezer bags (which are thicker than standard bags) before placing in plastic boxes. This creates two moisture barriers. The freezer bag also prevents cross-contamination if one item develops mould—it stays contained rather than spreading to everything in the box.
Battery and Electronics Protection
Batteries and electronics are particularly vulnerable to moisture damage, and failures often go undetected until you actually need the items during an emergency.
Battery terminal wrapping: Wrap battery terminals (the metal ends) with a single layer of cling film before storing. This prevents corrosion from moisture contacting the metal while still allowing you to identify battery type and check dates. It adds 30 seconds per battery but prevents the frustrating discovery during a power cut that your stored batteries have corroded and leaked.
Batteries stored in sealed bags with silica gel: Group batteries by type (AA, AAA, D, 9V) in small sealable freezer bags with a silica gel packet in each bag. Label the outside with battery type and purchase date. This contains any leakage (preventing damage to other batteries) and keeps moisture away from terminals.
Electronics in sealed boxes, NOT loose in damp cupboards: Torches, radios, and other battery-powered equipment should be stored in sealed Really Useful Boxes or ammo cans with silica gel, not loose on cupboard shelves. Moisture causes internal corrosion on circuit boards long before visible external damage appears. A torch might look fine but fail to work when you need it because internal contacts have corroded.
Regular testing every 3 months: Every three months, test stored electronics briefly. Turn on torches for 30 seconds. Check radios receive signals. Verify power banks charge phones. This catches failures before emergencies occur, as discussed in the Power Cut Survival Guide. Replace or repair anything that doesn’t work immediately.
Remove batteries from stored torches: If you’re storing torches long-term (6+ months), remove batteries and store them separately. This prevents battery leakage from destroying the torch. Yes, it means you need to install batteries during an emergency, but that takes 10 seconds. Replacing a torch destroyed by leaked batteries costs £10-30 and might not be possible during a power cut.
Document and Paper Protection
Important documents can’t be replaced easily, making their protection particularly critical.
Plastic document wallets inside fireproof boxes: Store each important document (passport, birth certificate, insurance policy) in a clear plastic wallet, then place all wallets inside a fireproof document box. This provides protection from both fire and moisture. The plastic wallet adds a moisture barrier that basic fireproof boxes don’t provide, as detailed in the Emergency Document Firebox guide.
Laminating critical documents: Laminating creates a waterproof and damp-proof barrier. Laminate copies of essential documents (not originals—you need originals for legal purposes, but laminated copies are useful for grab bags). Laminating pouches cost pennies, and most print shops offer laminating services for £1-2 per document if you don’t own a laminator.
Avoiding basements for document storage: Basements are the worst location for documents. Rising damp, poor ventilation, and cold surfaces create consistently high humidity. If you must use basement storage, use multiple layers of protection: documents in plastic wallets, inside sealed boxes, with silica gel packets, raised off the floor on shelving.
Ventilation Without Compromising Security
Moisture control often requires ventilation, but opening windows creates security risks discussed in the Home Security During Disruption guide. Balance is needed.
Air bricks in storage cupboards: Victorian houses often have air bricks (vented bricks allowing airflow) below floor level. Don’t block these with storage or furniture. They’re designed to prevent damp and blocking them makes the problem worse. If your storage cupboard lacks ventilation and sits against an external wall, consider having an air brick installed—it costs £50-100 but solves persistent damp problems permanently.
Trickle vents in windows: Modern windows have small vents at the top that allow minimal airflow without opening windows fully. Use them. They’re designed to provide ventilation while maintaining security and heat retention. Many households seal these closed to reduce draughts, then wonder why condensation forms on windows.
Opening cupboard doors periodically: Once weekly, open all storage cupboard doors for at least an hour to allow air circulation. This is particularly important in winter when humidity is high and cupboards stay closed for weeks. Set a reminder on your phone—Sunday mornings work for most people.
Avoiding sealing rooms completely: Don’t seal storage rooms completely in an attempt to maintain temperature. Some airflow is necessary to prevent moisture accumulation. Even heated rooms need air exchange. Complete sealing creates perfect conditions for condensation and mould.
Balancing ventilation with heating costs: Opening windows in winter releases expensive heated air. This is why mechanical solutions like dehumidifiers are often more cost-effective than passive ventilation during winter. A dehumidifier running costs £2-4/week. Heating a constantly ventilated room costs significantly more. Calculate your specific situation, but generally: dehumidifier for winter, natural ventilation for summer.
Location Strategy for Damp-Prone Properties
Where you store supplies matters as much as how you store them. Some locations in UK homes are inherently problematic.
Avoid these locations:
- Under-stairs cupboards against external walls: Cold, unventilated, against damp walls—the worst combination
- Basements: Rising damp, poor ventilation, cold temperatures, often flooding-prone
- Unheated lofts: Extreme temperature swings, condensation on cold roof structure, difficult access for monitoring
- Garages: Unheated, often damp, temperature extremes, security risks
Better locations:
- Internal cupboards: Not against external walls, benefit from ambient household heat
- Airing cupboards: Residual heat from boiler keeps them dry (but not too hot for food)
- Bedroom wardrobes: Heated rooms, regular access for monitoring
Best locations:
- Heated rooms with regular airflow: Spare bedroom with window vents, heated hallway cupboard
- Climate-controlled spaces: Any storage area maintained at 15-20°C with RH below 60%
High-rise flat specific advice: Avoid external wall cupboards entirely in tower blocks—they’re almost always damp. Use internal storage only, even if it means storing less. A smaller quantity of usable supplies is better than larger quantities ruined by damp.
Ground floor specific advice: Raise storage off the floor using shelving or pallets. Damp rises through concrete floors, especially in older properties. Even 15cm elevation makes a significant difference. Never store directly against external ground-floor walls.
Seasonal Damp Management
Damp problems change with seasons. Your prevention strategy should adapt accordingly.
Winter (October-March): Condensation peaks during this period. Run dehumidifiers continuously in storage areas. Check storage weekly for moisture issues. Regenerate silica gel packets monthly. Expect to empty dehumidifier tanks daily. This is the high-risk period for damp damage.
Spring (April-May): Check everything for winter damage. Inspect all tins for rust, check dry goods for moisture penetration, test electronics. Rotate stock, using anything approaching expiry dates. Clean and service dehumidifiers. Regenerate all silica gel even if it looks fine—start summer fresh.
Summer (June-August): Lower humidity but check for heat damage to medications, batteries, and chocolate-based foods. Reduce dehumidifier use unless humidity exceeds 60%. Maintain ventilation without running equipment constantly. This is the easy season—use it to reorganise and improve storage systems.
Autumn (September-October): Prepare for winter condensation. Test dehumidifiers before they’re needed. Check seals on storage boxes—replace any with damaged gaskets. Top up silica gel supplies. Position moisture indicator cards in key storage areas so you’ll know when winter damp begins.
Monthly inspection routine (15 minutes year-round): Open all storage boxes and check for condensation on inside surfaces. Inspect tins for rust spots. Check silica gel packets (regenerate if saturated). Empty dehumidifier tank and check it’s working. Rotate stock by moving oldest items forward. This catches problems early when they’re fixable rather than catastrophic.
Warning Signs Your Storage Has Damp Problems
Early detection prevents losses. Learn to recognise warning signs before damage becomes severe.
Musty smell when opening cupboard: Your nose detects mould and mildew before your eyes do. A musty, earthy smell indicates mould spores are present and active. Don’t ignore this—it’s the earliest warning sign.
Condensation on inside of plastic boxes: If you open a sealed box and see water droplets on the lid or walls, moisture got inside and temperature changes caused condensation. Everything in that box is at risk.
Rust spots on tins: Even tiny rust spots indicate the protective coating has failed. Check these tins weekly and use them soon. Once rust starts, it accelerates.
Clumping in salt, sugar, or flour: These dry goods should flow freely. If they’ve formed clumps, moisture has penetrated the packaging. For salt and sugar, you can sometimes dry them out and continue using. For flour, bin it—moisture in flour creates mould and bacterial growth risks.
Cardboard feels soft or damp: Dry cardboard is rigid. Damp cardboard feels soft and flexible. If packaging feels damp, the contents are compromised regardless of how they look.
Silica gel packets saturated: Indicating silica gel changes from blue (dry) to pink (saturated). If packets go pink within days of placing them, you have a serious moisture problem requiring active dehumidification, not just passive absorption.
Mould visible on walls or ceiling of storage area: Black, green, or white patches on storage area surfaces indicate humidity has exceeded 70% for extended periods. This requires immediate intervention—everything in that space is at risk.
Emergency Drying After Water Ingress
Sometimes storage areas flood or leak. Fast response saves supplies that might otherwise be lost.
What to save vs what to bin: Tins can potentially be saved if dried immediately. Dry goods in compromised packaging must be binned—you cannot determine contamination visually. Electronics might be saveable if dried properly before powering on. Documents can sometimes be rescued. Medications should be binned if packaging was breached.
Dehumidifier on maximum plus windows open: This seems contradictory but works. The dehumidifier extracts moisture from the air, while open windows exhaust that air and bring in fresh air to be dried. This creates a flow-through system that dries the space faster than either method alone. Run this for 24-48 hours after water damage.
Tins exposed to water: Wipe completely dry immediately. Check seams and lids for damage. If undamaged, dry thoroughly, then coat lightly with cooking oil to prevent rust. Use these tins within three months—don’t trust them for long-term storage after water exposure. Any tin with damaged seams or dents goes straight in the bin.
Dry goods in breached packaging: Bin everything. You cannot visually determine if floodwater (which may contain sewage, chemicals, or bacteria) has contaminated the contents. A £5 bag of rice isn’t worth the health risk.
Electronics rescue procedure: Remove batteries immediately. Do not power on. Place item in a sealed bag with multiple silica gel packets for 48 hours minimum (72 hours better). The silica gel pulls moisture from inside the device. After drying period, test briefly. If it works, continue using but monitor for corrosion over following weeks. If it doesn’t work, bin it—attempting repairs on corroded electronics rarely succeeds.
Document drying: Separate pages carefully—they’ll stick together when wet. Fan pages out and lay flat on absorbent material (towels, newspaper). Use gentle heat (near a radiator, not on it) and airflow (fan, not hairdryer—too hot). Don’t rush this—documents dried too quickly become brittle and crinkly. Slow drying over 48-72 hours preserves them better. Severe soaking might leave documents wrinkled but readable, which is acceptable for insurance policies and similar critical paperwork.
Budget Damp Prevention (Under £50 Setup)
Effective damp prevention doesn’t require hundreds of pounds. This budget setup protects a three-month supply of emergency goods.
Shopping list:
- 5× Really Useful Boxes 35L: £40 (£8 each)
- 500g bulk silica gel sachets from eBay: £8
- Pack of 10 moisture indicator cards: £3
- Total: £51
What this protects:
- Three-month rotating food pantry (as detailed in the 3-Day Emergency Pantry guide)
- Battery stockpile (all sizes, stored with silica gel)
- Basic first aid kit (protected from moisture degradation)
- Important documents (in plastic wallets inside one box)
- Emergency lighting (torches, candles, matches)
How to deploy: Decant tinned goods from cardboard packaging into boxes. Add silica gel packets to each box (2-3 packets per 35L box). Place one moisture indicator card in each box. Store boxes in the driest available location. Check monthly for moisture indicator colour change. Regenerate silica gel when saturated (every 2-3 months in damp conditions).
This budget setup won’t handle severe damp problems (those require dehumidifiers), but it prevents moisture damage in moderately damp conditions, which covers most UK households.
Premium Setup (Serious Long-Term Storage)
For households serious about long-term preparedness, this setup provides comprehensive protection with minimal ongoing maintenance.
Shopping list:
- Desiccant dehumidifier (EcoAir DD1 type): £150-200
- 10× Really Useful Boxes (various sizes): £80
- 3× military surplus 50cal ammo cans: £30
- 1kg bulk silica gel plus 20 moisture indicators: £15
- Digital hygrometer/thermometer: £8
- Total: ~£280
What this enables:
- 12-month food rotation with zero losses to damp
- Electronics storage (torches, radios, power banks) with guaranteed functionality
- Long-term medication storage at stable temperature and humidity
- Document archive protected from all environmental damage
- Ability to store bulk purchases (panic-buying insurance)
Running costs: Approximately £8-12 monthly for dehumidifier electricity during winter (October-March). Summer running costs near zero as dehumidifier only runs intermittently. Annual cost roughly £50-70, protecting supplies worth £500+.
Return on investment: Prevents losses of £100-200 annually from ruined supplies. Pays for itself within 18-24 months through prevented waste. After that, it’s pure savings plus the confidence that your emergency supplies will actually work when needed.
Three Practical Checklists
Storage Damp Audit (30 Minutes)
Assess every storage area:
- Walk through your home identifying all locations where emergency supplies are stored
- Note which walls are external (these are cold and prone to condensation)
- Check for existing condensation, mould spots, or musty smells
- Feel cardboard and paper—damp feels soft and flexible
Test moisture levels:
- Place moisture indicator cards in each storage area for 24 hours
- OR use a digital hygrometer to measure RH percentage
- Record readings—anything over 60% RH requires intervention
- Identify the worst areas (highest RH, coldest temperatures)
List current storage by location:
- Create a spreadsheet or written list: what’s stored where
- Prioritise moving vulnerable items (batteries, medications, documents) from high-risk locations first
- Plan which items can tolerate moderate damp (sealed tins) vs which cannot (cardboard-packaged food)
Calculate intervention needed:
- Mild damp (60-70% RH): Passive control (silica gel, better containers) probably sufficient
- Moderate damp (70-80% RH): Active dehumidification likely required
- Severe damp (80%+ RH): Dehumidifier essential, plus investigate for leaks/rising damp
Monthly Inspection Routine (15 Minutes)
Open and check all storage boxes:
- Remove lids from storage boxes and check inside surfaces for condensation
- If you find condensation, wipe dry and add more silica gel
- Look for any changes since last inspection (new rust, packaging degradation)
Inspect tins for rust development:
- Run hands over tin surfaces feeling for rough spots
- Pay particular attention to seams and lids where rust starts
- Any rust found: use that tin within the next month
- Severe rust (pitting through metal): bin immediately
Check silica gel status:
- Remove silica gel packets and check colour
- Blue = working fine, leave in place
- Pink = saturated, needs regenerating
- Regenerate by baking at 120°C for 2-3 hours until blue returns
Empty dehumidifier tank:
- Check water level and empty if needed
- Clean tank if any algae or residue visible
- Verify dehumidifier is still running (check display/feel warm air output)
Rotate stock:
- Move oldest items to front of storage
- Check dates on medications, batteries, and foods
- Use anything within 3 months of expiry in normal daily life
- Replace used items to maintain stock levels
Seasonal Changeover (1 Hour, Twice Yearly)
Deep clean storage areas (April and October):
- Empty storage completely—remove all boxes and items
- Wipe down shelves and cupboard walls with dilute bleach solution (kills mould spores)
- Allow to dry completely before restocking
- Check for any structural damp issues (new mould patches, wet patches on walls)
Replace all moisture absorbers:
- Regenerate all silica gel packets even if they look fine
- Replace disposable calcium chloride traps
- Install fresh moisture indicator cards
- Start the season with maximum moisture protection
Repack items into fresh containers if needed:
- Check all storage box seals—replace any with damaged gaskets
- Consolidate partially-full boxes to reduce number of containers
- Re-label everything with current contents and dates
- Ensure newest items are at back, oldest at front
Service dehumidifier:
- Clean or replace filter (check manufacturer instructions)
- Wipe down exterior and clean water tank thoroughly
- Check drainage hose if using continuous drain mode
- Test operation—should extract moisture and output warm air
Update inventory and bin compromised items:
- List everything currently stored with quantities and dates
- Identify items approaching expiry
- Bin anything showing rust, mould, pest damage, or moisture damage
- Calculate replacement needs and add to shopping list
Final Thoughts
Damp isn’t dramatic. It’s not a flood tearing through your home or a storm ripping off your roof. It’s condensation forming on a cold wall at 3am, slowly rusting tins you won’t check until they’ve failed. It’s mould growing in the back corner of a cupboard you open once a month. It’s batteries corroding in their packaging while they sit in a drawer.
British housing and British weather conspire to create damp conditions in storage spaces. You can’t change the weather, and most people can’t afford to move to better housing. What you can do is understand the physics of moisture, use the right containers, deploy dehumidifiers where needed, and check your storage regularly before problems become catastrophic.
A £150 dehumidifier running for £10/month during winter protects £500 of emergency supplies. A £40 investment in proper storage boxes prevents £200 of losses to rust and mould. Monthly inspections taking 15 minutes catch problems when they cost £5 to fix instead of £50 to replace.
The goal isn’t perfect climate-controlled storage that costs hundreds monthly. The goal is preventing avoidable losses through basic moisture control that costs less than replacing ruined supplies. Check your storage monthly, keep humidity below 60%, use sealed containers, and deploy dehumidifiers in problem areas.
Your emergency supplies need to last until you need them, not just until the damp gets them. That’s what damp prevention achieves—boring, practical, cost-effective protection of things you’ve worked to build up.
Store it properly, and it’ll be there when the power goes out.
Build Your Resilience
Further Reading: Related Guides
All our guides can be found listed on our resilience hub.
Gear We’ve Tested & Reviewed
- EcoAir DD1 Simple Desiccant Dehumidifier Review
- ThermoPro TP50 Digital Hygrometer Review
- Really Useful Boxes Review
All our reviews can be found on our reviews and resources page.